Deep Dive Article
How to Use 9Router: The Ultimate Local AI Proxy to Bypass Quotas & Slash API Costs (2026)
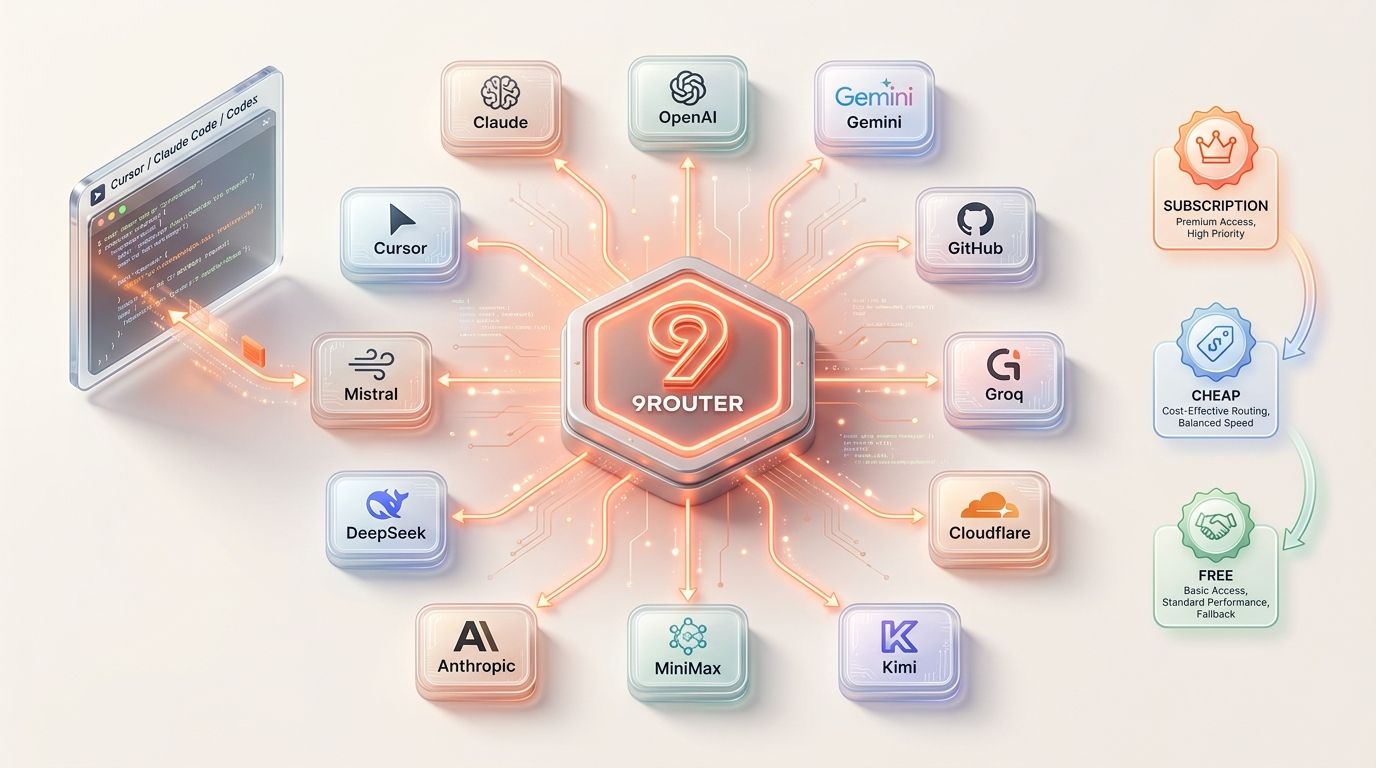

When you are in the flow of programming, hitting a rate limit can bring your productivity to a grinding halt.
Fortunately, there's a powerful, open-source solution that sits right on your computer to solve this: 9Router. (If you want to see how we build systems like this or read more about custom integrations, check out Saurabh Sharma's Portfolio).
In this guide, we will break down what 9Router is, how it works in a simplified way, how you can use it with your favorite coding tools, and how it compares to alternatives like Omnirouter.
What is 9Router?
At its core, [9Router](https://9router.com) is an open-source, local AI proxy server. Think of it as a smart traffic cop that sits between your AI coding applications (like Claude Code or Antigravity) and the AI models themselves (like OpenAI, Anthropic, or Gemini).
Instead of connecting each of your coding tools directly to individual AI providers, you connect all your tools to 9Router. 9Router then handles the logic of which account or provider to use, how to optimize the tokens to save you money, and how to switch accounts if one hits a limit.
It runs locally on your machine (defaulting to http://localhost:20128/v1) and exposes a standard, OpenAI-compatible API. This means almost any AI tool that lets you customize the API URL can work with 9Router!
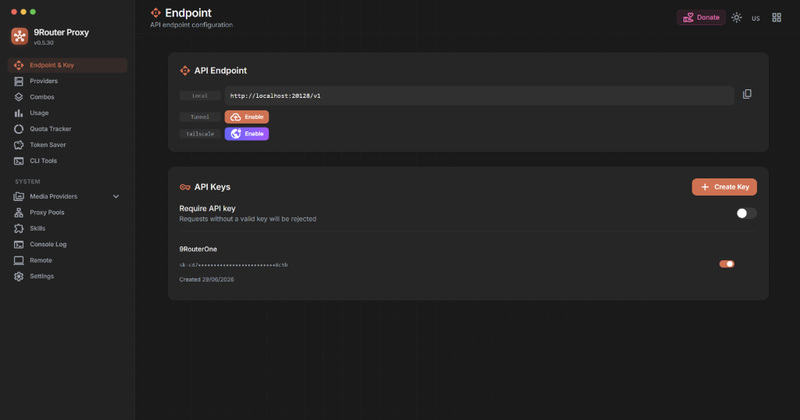
*Figure 1: Configuring your local 9Router endpoint and generating API keys.*
Key Features: How 9Router Saves You Money and Time
9Router is packed with features designed specifically for developers using AI coding workflows:
1. Smart 3-Tier Fallback (The Quota Lifesaver)
Instead of relying on a single API key, 9Router lets you pool multiple accounts and providers. It organizes them into three tiers:
- Tier 1 (Subscription/Premium): Your primary accounts (e.g., your paid Claude Pro or ChatGPT Plus accounts).
- Tier 2 (Cheap API): Pay-as-you-go keys (like cheap Claude Haiku or GPT-4o-mini keys) that act as a backup.
- Tier 3 (Free Tier): Free-to-use models or local models running on your own machine.
If your Tier 1 account hits a rate limit or goes down, 9Router instantly and seamlessly switches your query to Tier 2, and then Tier 3. Your coding session never pauses!
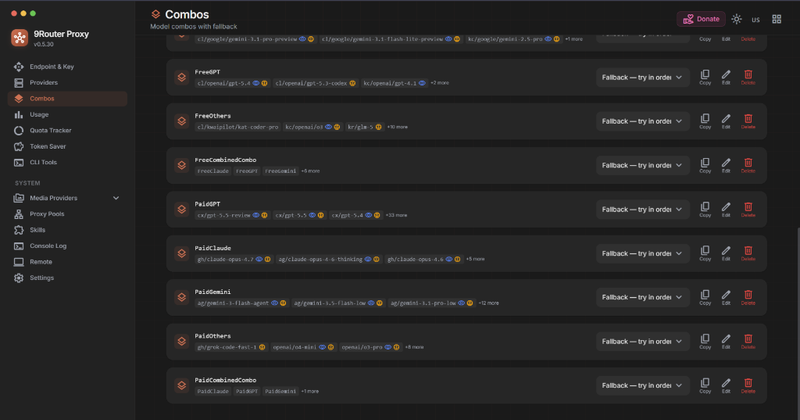
*Figure 2: Setting up custom fallback routing queues for different models and price tiers.*
2. RTK Token Saver (Rust Token Killer)
AI coding tools are notoriously chatty. When they run commands like git diff or grep, they send massive amounts of whitespace, comments, and redundant metadata to the LLM.
9Router's built-in RTK (Rust Token Killer) Token Saver automatically strips out this unnecessary code bloat before sending it to the provider. This lossless compression reduces your input tokens by 20% to 40% without hurting the model's performance.
3. Caveman Mode
For those times when you want straight answers without the friendly fluff, you can turn on Caveman Mode. This forces the AI to output highly concise, direct code solutions, saving up to 65% of output tokens.
Detailed Use Cases: CLI & GUI Tools
Because 9Router exposes a standard local API, you can easily hook it up to both CLI (terminal) and GUI (desktop application) tools.
While I have personally tested 9Router with the specific tools listed below, its official documentation shows that support for other AI applications is highly extensive. Thanks to its OpenAI-compatible format, the integration of 9Router with most of the industry's famous AI tools is incredibly smooth and reliable.
1. Using 9Router with CLI Tools
If you prefer running your AI agents directly inside your terminal, I have personally tried and tested 9Router with:
- Claude Code: Configure your Claude CLI to point to
http://localhost:20128/v1as its custom base URL. - Codex: Route your local terminal commands through the 9Router endpoint.
- Antigravity: Seamlessly proxy your agentic tasks locally.
- OpenCode: Maintain low latency and offline-fallback setups right in your shell.
2. Using 9Router with GUI Windows Apps
If you prefer visual desktop environments, I have also used it with the Windows GUI apps of:
- Codex (ChatGPT Desktop App)
- Antigravity GUI
- OpenCode GUI
Simply open the settings in these apps, navigate to the API/Connection configuration, and replace the default OpenAI/Anthropic endpoint with http://localhost:20128/v1. Because it behaves exactly like a standard endpoint, almost any popular AI tool or editor (like Cursor, VS Code, or Cline) can be configured to use 9Router in a matter of seconds.
How to Verify if Your Integration is Working?
Once you have configured your tool, you can easily validate if the integration is active and functioning correctly:
- Check the 9Router Console/Terminal: The local terminal where 9Router is running will output real-time request logs, status codes, and active routing decisions as your AI assistant queries it.
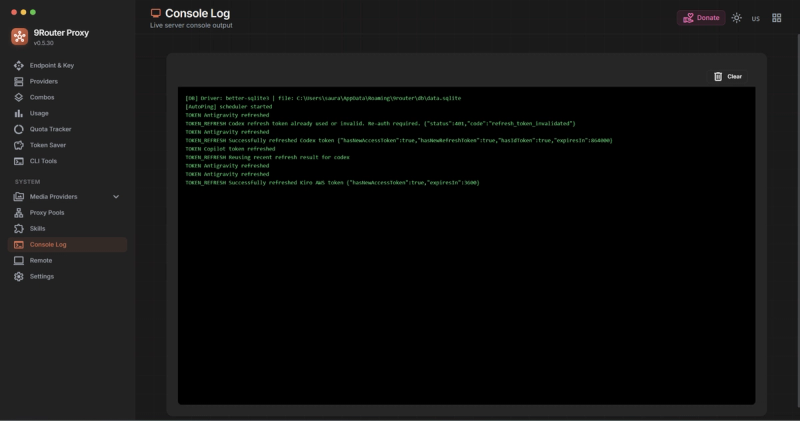
*Figure 3: Real-time request and token refresh logs in the 9Router console.*
- Check the Quota Tracker: Open the 9Router web dashboard and check the quota tracker. You will see the token usage count increment and your combined request stats update live the moment your tool makes a request.
Using Multiple Accounts (e.g., 2 ChatGPT Codex Accounts)
One of the coolest features of 9Router is the ability to connect multiple accounts of the same provider.
For example, if you have two separate ChatGPT Codex accounts, you can add both of their API keys to 9Router. 9Router will distribute the load between them in a "round-robin" fashion or switch to the second account the moment the first one hits its hourly rate limit. This effectively doubles your daily coding limits!
Inside the 9Router Dashboard
Once you start 9Router on your machine, you can open your web browser and navigate to the local dashboard (usually at http://localhost:20128/dashboard).
Here is what you will find inside the 9Router dashboard:
- Provider Connections: A visual interface where you can paste, organize, and toggle API keys for over 40+ providers.
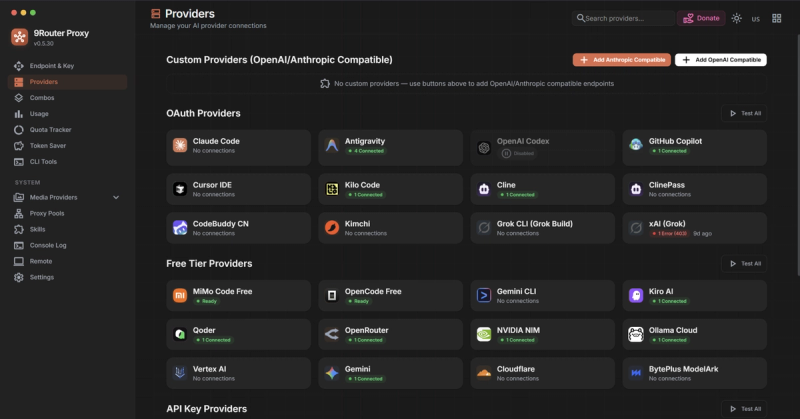
*Figure 4: The 9Router providers dashboard with OAuth and Free Tier integrations.*
- Combo Routing: Combine multiple keys and customize fallback sequences easily without writing config files.
- Real-Time Quota Tracking: See exactly how close you are to hitting limits on each connected account.
- Combined Usage Metrics: A live graph showing your combined token consumption, request history, and cost-savings stats.
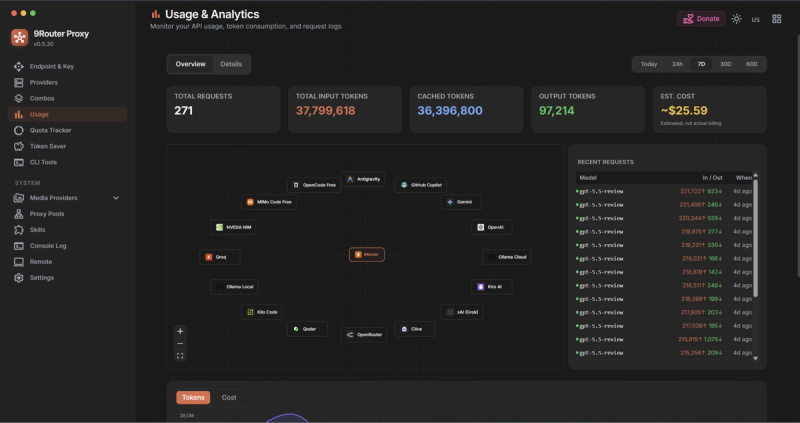
*Figure 5: High-level analytics showing total tokens saved, estimated cost, and visual connection graph.*
- RTK and Caveman Toggles: Turn token compression and Caveman Mode on or off with a single click.
9Router vs Omnirouter: What's the Difference?
When exploring local AI proxies, you might also run into Omnirouter (OmniRoute). Here is how they compare:
- Lineage: OmniRoute is actually a modern fork and rewrite of 9Router.
- Under the Hood: While 9Router is built primarily around a GUI-first approach to route local APIs, OmniRoute is rewritten in TypeScript to support larger-scale integrations and even wraps/embeds 9Router's processes within its own architecture.
- Core Focus: 9Router is perfect for individual developers looking for a fast, user-friendly dashboard to manage their local coding setups. OmniRoute is aimed at power users who need advanced multi-modal APIs and deeper system-level supervision.
Boost Your Coding Workflows Today
By using a local proxy like 9Router, you gain complete control over your AI subscriptions, protect yourself from unexpected downtime, and save up to 40% on API costs.
If you are facing any issues during your setup or have any queries, please drop a comment down below I would love to help you out! Also, if you enjoyed reading this guide, please hit the like button and show your support.
If you are looking to integrate advanced AI coding tools, custom API pipelines, or robust local workflows into your software projects, hire me for expert software development services or explore my full portfolio of AI integration services.